Product photography is a branch of photography that involves taking pictures of products for various purposes, such as advertising or cataloging. It is a highly specialized field that requires both technical skills and an eye for composition and lighting.
If you want to get into product photography, there are a few things you need to know about how to edit photos for product photography. In this article, we will go over some of the basics of photo editing for product photography.
Crop the photo to remove any unnecessary background:

This is perhaps the most important step in editing photos for product photography. The background can often be distracting and take away from the product itself. By cropping the photo, you can remove any unwanted elements from the frame and focus solely on the product.
Adjust the levels:
Levels are one of the most important tools in Photoshop for photo editing. By adjusting the levels, you can change the contrast and brightness of the photo to make the product stand out more.
Enhance the colors:
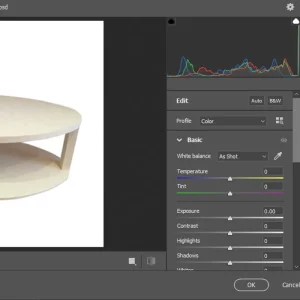
Another important step in editing photos for product photography is to enhance the colors. This can be done using several different Photoshop tools, such as curves or vibrancy. By enhancing the colors, you can make the product more eye-catching and vibrant.
Remove any blemishes or wrinkles on the product:
This is an important step in editing photos for product photography because blemishes and wrinkles can often be distracting and take away from the overall look of the product. By removing any blemishes or wrinkles, you can create a more polished image.
Add a vignette:
A vignette is a great way to add depth and dimension to a photo. By adding a vignette, you can make the product appear to pop off the page.
Use contrast and color adjustments to make the product stand out against the background:
Contrast and color adjustments are extremely important when editing photos for product photography. By increasing the contrast, you can make the product appear to be more three-dimensional.
- Use curves or vibrance to enhance colors: As we mentioned before, enhancing colors is a great way to make the product more eye-catching. By using curves or vibrance, you can really make the colors pop.
- Remove any blemishes: Again, blemishes can be very distracting and take away from the overall look of the product. By removing any blemishes, you can create a more polished image.
- Add a vignette: Vignettes are a great way to add depth and dimension to a photo. By adding a vignette, you can make the product appear to pop off the page.
Add a border or frame around the photo for a polished look:
This is a great way to finish off your edited photo and give it a polished look. By adding a border or frame, you can really make the product stand out.
Save your edited photo:
Once you are happy with your edited photo, be sure to save it so you can use it for future product photography.
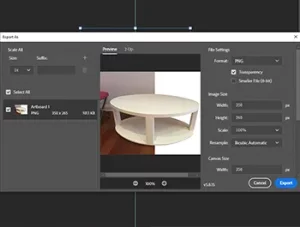
Save the photo in a high-resolution format:
This is important so you can use the photo for future product photography. By saving the photo in a high-resolution format, you will be able to print it out or use it online without losing any quality.
Export the photo as a JPEG:
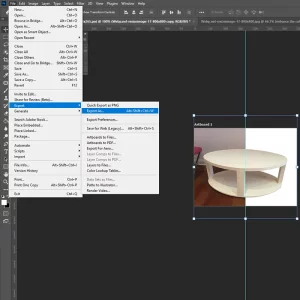
This is the most common file format for photos and it will be compatible with most devices and software.
Save the photo in a folder:
This will help you keep your photos organized and easy to find.
Give the photo a descriptive name:
This is helpful so that you can easily find the photo later on.
Add keywords to the photo:
This is helpful for search engines so that your photo comes up when people are searching for product photography.
Save the photo:
Once you have completed all of these steps, be sure to save the photo so you can use it for future product photography.
FAQ
How do I make the product stand out against the background?
Use contrast and color adjustments to make the product stand out against the background: Contrast and color adjustments are extremely important when editing photos for product photography. By increasing the contrast, you can make the product appear to be more three-dimensional
How do I enhance colors in the photo?
As we mentioned before, enhancing colors is a great way to make the product more eye-catching. By using curves or vibrance, you can really make the colors pop.
How do I remove any blemishes or wrinkles from the product?
Again, blemishes can be very distracting and take away from the overall look of the product. By removing any blemishes, you can create a more polished image.
How do I add a border or frame around the photo?
This is a great way to finish off your edited photo and give it a polished look. By adding a border or frame, you can really make the product stand out.
How do I save my edited photo?
Once you are happy with your edited photo, be sure to save it so you can use it for future product photography.
Conclusion:
Product photography is an important part of marketing and selling products. By following these steps, you can ensure that your photos are high-quality and eye-catching.
By using contrast and color adjustments, removing blemishes, and adding a vignette, you can make the product stand out.