Jewelry photo retouching requires both creativity and pure skill. But, maintaining appropriate steps is a big challenge. A checklist is a powerful tool to help you organize the photo retouching process and eliminate any guesswork.
When retouching jewelry photos, the checklist guarantees you have caught everything crucial. It also ensures that the process has been completed systematically. This approach is quite helpful in reaching your desired result.
In this blog post, we will share a practical checklist for jewelry photo retouching and some helpful tips that every retoucher should follow.
Why Is Creativity Crucial In Jewelry Photo Retouching?
Creative retouching has crucial roles in jewelry photography from many angles. They are directly linked to customer experience. High-quality jewelry images come from careful and laborious retouching that assists in building a solid brand. Also, those shining photos create visual appeal and influence customers to purchase.
Since the jewelry market is highly competitive, you must differentiate your brand from others. Photo retouching is a significant part of this process. It is a powerful way to establish a brand effect and unique style for your jewelry business.
Note: In the below jewelry photo retouching checklist, we have mentioned basic and advanced steps. You can apply a few or all of them to a jewelry photograph, depending on your creative requirements.
Basic Retouching Checklist For Jewelry Photos:
Following these steps are mandatory for any jewelry image. Despite excellent photoshoots, they will make ornaments look great. Let’s check them out:
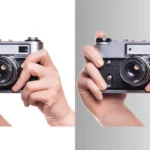
1. Remove the background
Background removal from jewelry images is the most common retouching technique. It does not only make the jewelry beautiful in photos. Instead, it confirms concentrating on the ornament without surrounding distractions. For example, an image of a neckless looks more clean and highlighted on a table rather than on an untidy surface.
Hundreds of software are used to remove photo backgrounds. However, Photoshop is more famous for complex background removal like ornaments. After removing the background, you get a professional-looking jewelry image for promotional purposes.
2. Adjust contrast and brightness
Contrast and brightness adjustment means making the dark parts darker and the bright parts brighter. This crucial step in jewelry retouching creates a visual impact. By modifying the contrast and brightness, you can fine-tune the image’s illumination and catch people’s eyes. After a perfect adjustment, gemstones and ornament surfaces get their best look in photographs.
3. Sharpen the image
Sharpening jewelry images enhance their clarity and highlight delicate details. Photo editing software like Photoshop has advanced options for sharpening gemstones, metalwork, and textures of ornaments. Sharpening makes those images more polished and captivating. As the tiniest elements are highlighted, jewelry images look more attractive to customers.
4. Crop and straighten the image
To eliminate distractions from jewelry photos, crop them and highlight the best features. It will draw people’s attention entirely to the jewelry. Along with cropping, do not forget to straighten the image alignment. This step helps you give the jewelry photograph a professional look.
Two of these corrections are compulsory for the professional and systematic presentation of jewelry. They ensure perfect demonstration of ornaments on catalogs and e-commerce websites.
5. Work on white balance and color correction
Both are essential steps of jewelry photo retouching. During the photoshoot, unwanted colors can come in the photograph. You must remove the undesirable color casts by applying retouching techniques. Besides, adjust the hues of gemstones, metals, and other elements to make the appearance vibrant. The combination of both works makes jewelry images more accurate. They also help you restore the ornament’s natural radiance. Appropriate white balance and color help display jewelry accurately and let customers make a wise buying decision.
Advanced Retouching Checklist For Jewelry Photos:
When the basic retouching is done, it is time to go through some advanced work. Check the list below that progressive retouching covers:
1. Work on depth of field
The depth of field in jewelry photography is necessary for marketing and promotion. Photo retouching can improve the depth with various processes. Such techniques may involve duplicating image layers, increasing field blur effect radius, applying depth maps, and combining effects.
Applying these methods, you can make an ornament’s photo outstanding and 3-dimensional. As a result, its fine details and textures become more visible and attractive. Utilizing depth of field is one of the advanced photo polishing secrets that finally gives a high-end look.
2. Apply Bokeh
Bokeh is a background style in photographs that consists of soft and colorful circles of light. It is a creative background type you can use in jewelry images. Bokeh creates a luxurious effect representing a sense of depth. Though Bokeh is a photo shooting technique, you can make the effect in Photoshop by combining the cutting, masking, layering, and blurring techniques.
When used as background, the approach highlights subtle details of ornaments and draws people’s attention. It makes the image’s subject visually appealing and creates a magical surrounding. Bokeh is a proven technique for the high-end presentation of jewelry items.
3. Remove dust and blemishes
During jewelry photoshoots, unwanted elements and imperfections can appear in photos naturally. You must eliminate them during the retouching process. Make sure that the final images look perfect from every angle.
Healing brush or clone stamp in Photoshop are two powerful tools for such retouching. Removing dust and blemishes makes jewelry photos more professional. It also displays the true beauty of jewelry and prepares images for marketing on online and offline platforms.
4. Add creative effects
Using creative effects on jewelry photos allows for artistic enhancement. You can add reflections, custom lighting, glow, and color grading to give an ornament image a unique and captivating character.
The aim of adding creative effects to jewelry photos is to express exceptional emotions required for visual storytelling. If applied correctly, those photos become a piece of art rather than a jewelry picture. These effects also make photographs appealing and memorable.
5. Enhance the gemstones
Gemstone enhancements are done to refine and highlight the beauty of expensive stones like diamonds, rubies, etc. Such retouching includes altering the contrast and saturation. These techniques make their surfaces brighter, more shining, and vivid.
Working on gemstones does not only beautify the jewelry’s overall appearance. Advanced retouching helps represent the actual value of such gems. When polished digitally, their photographs become more captivating and pull buyers quickly.
Pro Tips For During And After Jewelry Photo Retouching
Whether it is basic retouching or advanced, professional tips are effective in jewelry photo retouching. Check the following and keep them in mind during retouching.
Use different tools and methods:
Each jewelry photo is unique and may need a different retouching approach. Based on the type of photo, apply various tools and techniques suitable for the specific image to achieve the desired result.
Avoid over-retouching:
A major target of photo retouching is to make images more realistic. Therefore, keep the authentic look of the ornament during the process. Do not apply excessive retouching techniques that make the subject artificial.
Retouch high-quality photos:
Though the retouching technique will polish dull images and make them alluring, you still should pick the high-quality clicks only. Remember that good input will provide a high-end output finally.
Have a reference photo:
It is a good practice if you use a reference photo during the retouching process. The image will work like a standard of work. It will guide you to achieve professional results without any guesswork.
Keep the original file before editing:
Minor to major mistakes can happen during jewelry photo retouching. So, back up the original photo before you start the editing work. It will help you recover the default file easily.
Supervise the look and feel:
Before retouching jewelry images, set some principles of styles you want to achieve. After editing each part, check whether it has acquired the desired visual according to those principles.
Continue your experiments:
Experiments are practical ways to explore different options and unique outcomes you did not expect. When retouching jewelry photos, you should experiment with some new approaches as well.
Final Words
When you have a detailed and well-organized checklist, the retouching work will be easier and as expected. It sets a standard that helps achieve the desired quality of work. The list also reminds you if you have applied all essential things sequentially. As a retoucher, you must confirm all the above works are done. Since jewelry image retouching is complex, you can also go beyond fixed rules. To maximize creativity, you can experiment with different tools and methods for unique outcomes.